In Power Automate, creating a CSV file with a Byte Order Mark (BOM) can help ensure compatibility with applications that require UTF-8 encoding. This guide will walk you through setting up a flow that creates a CSV file with BOM in OneDrive.
Step-by-Step Guide
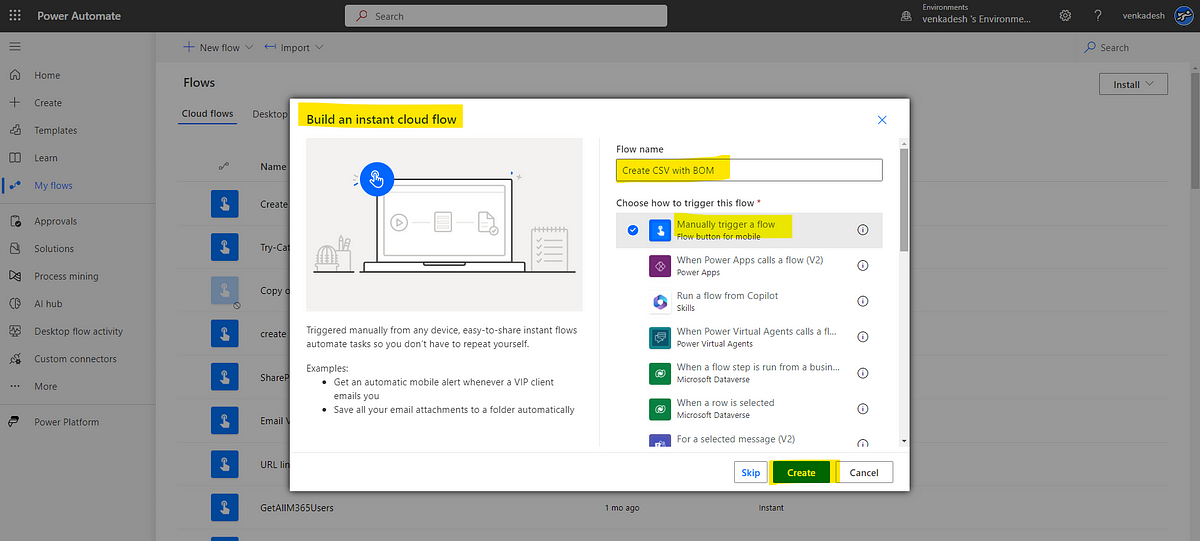
1.Create an Instant Flow
Start by creating an Instant Cloud Flow in Power Automate.
Click New flow > Instant cloud flow > Enter Flow name
Select Manually trigger a flow > Click Create
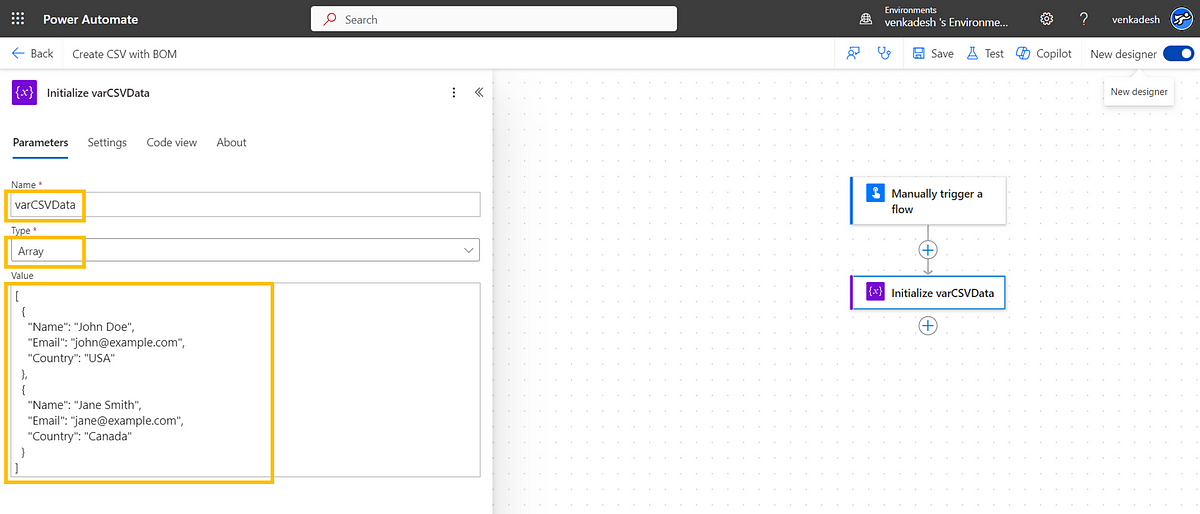
2.Initialize CSV Data Variable with Sample Data
Add an Initialize Variable action.
Set Name to varCSVData.
Set Type to Array.
In the Value field, enter your sample data directly, like this:
Optionally rename the action : Initialize varCSVData
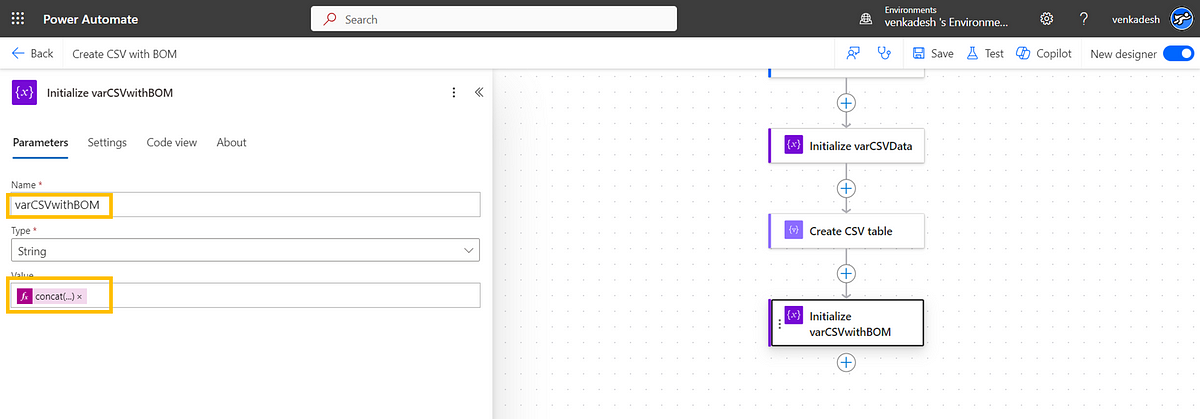
Optionally rename the action : Initialize varCSVwithBOM
The base64ToString('77u/') prefix adds the BOM
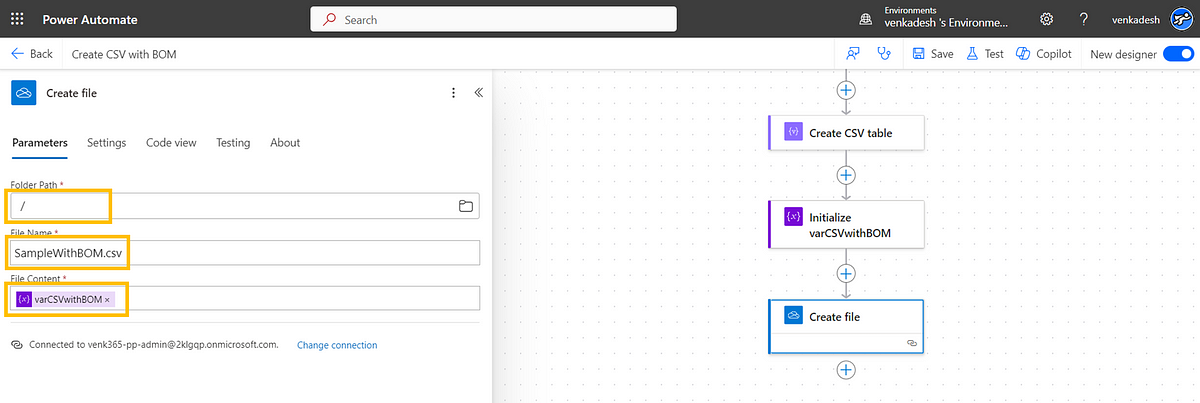
5.Create the File in OneDrive
Use the Create File action:
Folder Path: Choose your location (e.g., Root).
File Name: SampleWithBOM.csv.
File Content: Set to varCSVwithBOM.
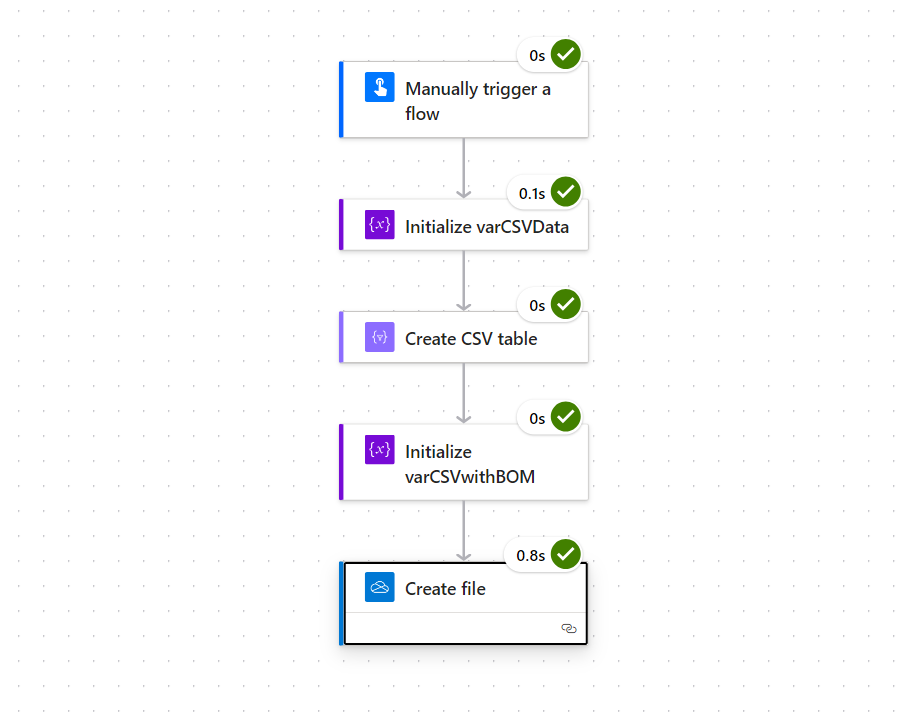
Final Steps and Testing
Save and run the flow to verify that the CSV file is created in OneDrive with BOM.
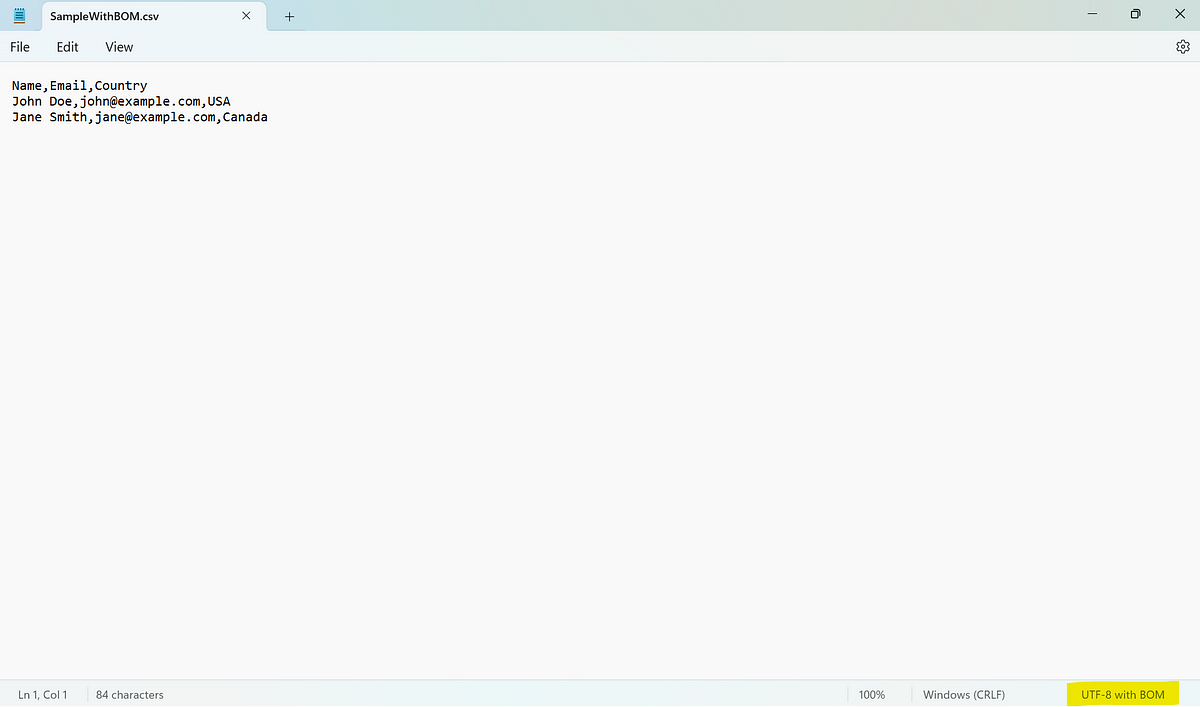
Once created, download the file and open it with a compatible editor to confirm the BOM is present.
Advantages of Adding a BOM in CSV Files
1.Improved Compatibility:
The BOM prefix ensures the CSV file is correctly interpreted as UTF-8, preventing encoding issues when opened in applications like Microsoft Excel. Without a BOM, special characters or non-ASCII text can appear garbled or incorrect.
2. Reliable Multi-language Support:
CSV files with BOM can handle data in multiple languages, supporting characters from non-Latin alphabets like Chinese, Japanese, Arabic, and Cyrillic. This is particularly useful in international settings or global applications.
3. Prevention of Data Loss or Corruption:
With the BOM, data corruption issues from encoding errors are minimized. This can be essential in workflows where CSV files are exchanged between different systems, some of which might not natively handle UTF-8 without BOM
Conclusion:
By creating CSV files with BOM in Power Automate, you can ensure data integrity and compatibility across different applications and languages, making your workflows smoother and more reliable.
We will walkthrough the process of uploading files from Microsoft Forms and saving them directly to a SharePoint document library. By integrating these two powerful tools, we can streamline file management and data collection workflows. Let’s get started! Prerequisites : Before we begin, make sure you have completed the following preparations: Create a Microsoft Form with an upload field to collect files from users. Set up a SharePoint document library where you want to save the uploaded files. Create a Power Automate flow to facilitate the integration between Microsoft Forms and SharePoint. Step 1: Create a Microsoft Form Upload File (upload) Accessibility (choice) Step 2: Set up a SharePoint Library Name (Built in Column) Accessibility (Single line of text) Step 3: Build the Power Automate Flow Create a new Automated cloud flow Choose trigger “When a new response is submitted” from the Microsoft Forms connector Select the Title of the Form from the dropdown list Add “Get Response Det...
Validating email formats in workflows is important to pre-check the data before using it in business logic and to avoid errors. While Power Automate has many actions, it doesn’t include advanced email validation by default. In this blog, you’ll learn how to create a Custom Connector to validate email addresses using C# code and Regex . High-Level Solution: Create a Custom Connector in Power Automate that uses C# and Regex for email format validation. Use the Custom Connector in Power Automate flows to dynamically validate email addresses. Steps to Implement: Step 1: Create the Custom Connector 1.1 Create Blank Custom connector Log in to Power Automate . From the left menu, select Custom Connectors . If not visible, go to More > Discover All > Locate Custom Connectors under the Data section. Click on New Custom Connector , then select Create from Blank . 1.2 General Configuration E...
In this article, we’ll explore the integration process of ServiceNow with Power Automate using the REST API and OAuth 2.0 Resource Owner Password Credentials, accompanied by an illustrative example — retrieving Service Request details from ServiceNow using Power Automate. Power Automate includes a built-in ServiceNow connector. In this blog post, we’ll explore an alternative method for establishing a connection with ServiceNow. Prerequisites: ServiceNow Instance: Access to a ServiceNow instance with the necessary permissions to create and manage API integrations. Power Automate Account: A Microsoft Power Automate account to create and manage automated workflows. Step 1: Register OAuth Application in ServiceNow Start by logging into your ServiceNow instance. Search for “ Application Registry ” and select the corresponding option. 3. Click on “ New ” 4. Select “ Create an OAuth API endpoint for external clients .” 5. Name your application (e.g., PowerAutomateApp) and leave the...


Comments
Post a Comment